Towers

Sometimes bigger is better! Towers are a unique statement piece in any playspace and can be themed to match almost any aesthetic. These kinds of structures can ignite a sense of magic and adventure to the surrounding environment and open a whole host of play possibilities for several age groups.
- CDP 108-P
Seashell Tower
Height: 8.5m Width: 8.35m Length: 14.05m Fall Zone Area: 120m2 Free Height of Fall: 2.4m  CDP 108-P
Seashell Tower
Height: 8.5m Width: 8.35m Length: 14.05m Fall Zone Area: 120m2 Free Height of Fall: 2.4m - 1421
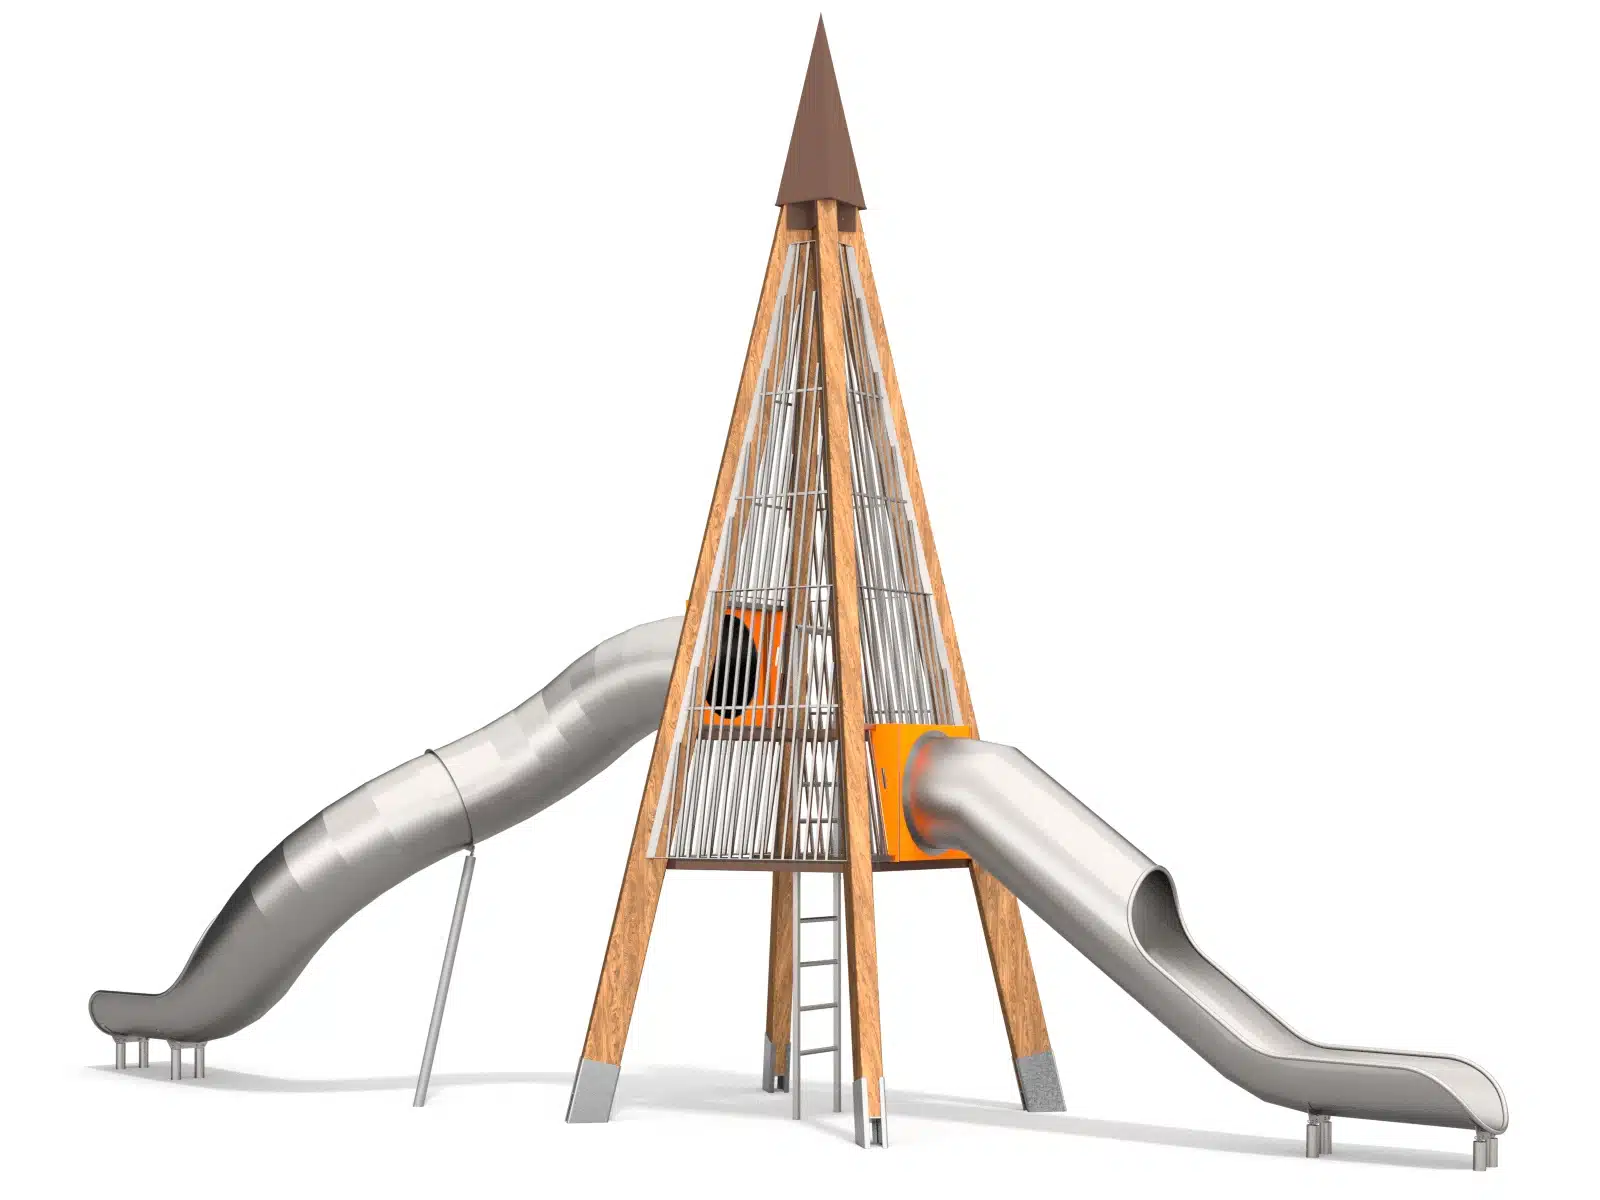
Single Peak Slide Tower
Height: 7.84m Width: 2.88m Length: 11.60m Fall Zone Area: 52.53m2 Free Height of Fall: -1.2m  1421
1421Single Peak Slide Tower
Height: 7.84m Width: 2.88m Length: 11.60m Fall Zone Area: 52.53m2 Free Height of Fall: -1.2m - 1433
Sky Village Tower
Height: 9.41m Width: 14.09m Length: 14.43m Fall Zone Area: 194m2 Free Height of Fall: 2.16m  1433
1433Sky Village Tower
Height: 9.41m Width: 14.09m Length: 14.43m Fall Zone Area: 194m2 Free Height of Fall: 2.16m - DGTS 102-R
Tetto Treehouse Mini Tower
Height: 2.7m Width: 1.5m Length: 3m Fall Zone Area: 22m2 Free Height of Fall: 0.65m  DGTS 102-R
Tetto Treehouse Mini Tower
Height: 2.7m Width: 1.5m Length: 3m Fall Zone Area: 22m2 Free Height of Fall: 0.65m - DGTS 104-R
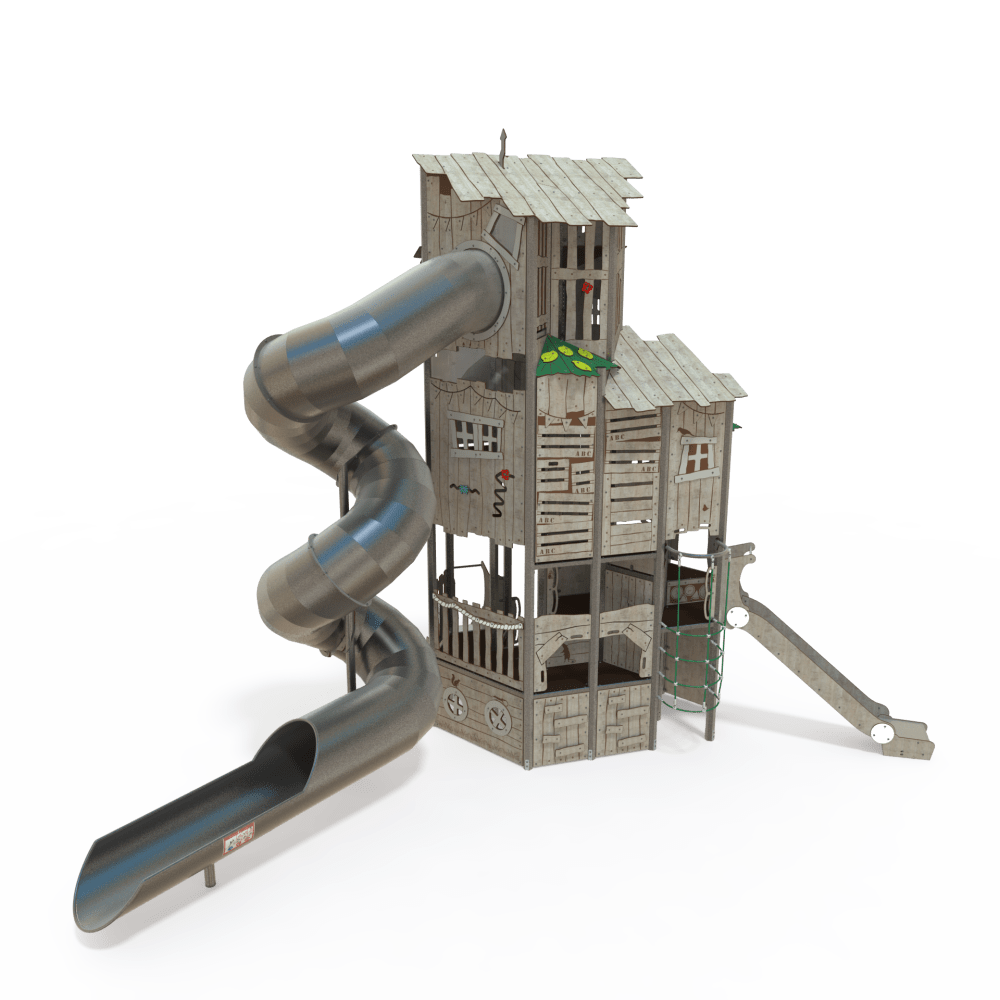
Tetto Treehouse Tower 104
Height: 3.6m Width: 4.9m Length: 5.15m Fall Zone Area: 47.9m2 Free Height of Fall: 1.55m  DGTS 104-R
Tetto Treehouse Tower 104
Height: 3.6m Width: 4.9m Length: 5.15m Fall Zone Area: 47.9m2 Free Height of Fall: 1.55m - DGTS 203-P
Tetto Treehouse Tower 203
Height: 6.05m Width: 5.85m Length: 7.6m Fall Zone Area: 64.3m2 Free Height of Fall: 1.5m  DGTS 203-P
Tetto Treehouse Tower 203
Height: 6.05m Width: 5.85m Length: 7.6m Fall Zone Area: 64.3m2 Free Height of Fall: 1.5m - DGTS 204-P
Tetto Treehouse Tower 204
Height: 6.05m Width: 6.8m Length: 12.75m Fall Zone Area: 105.8m2 Free Height of Fall: 2m  DGTS 204-P
Tetto Treehouse Tower 204
Height: 6.05m Width: 6.8m Length: 12.75m Fall Zone Area: 105.8m2 Free Height of Fall: 2m - CC 44-1003-T01
The Barrel Tower
Height: 6.81m Width: 6.28m Length: 6.59m Fall Zone Area: 62m2 Free Height of Fall: 2.25m  CC 44-1003-T01
The Barrel Tower
Height: 6.81m Width: 6.28m Length: 6.59m Fall Zone Area: 62m2 Free Height of Fall: 2.25m - MGBS 101-P
The Biggies Series 101-P
Height: 7.00m Width: 7.9m Length: 8.1m Fall Zone Area: 72m2 Free Height of Fall: 2.00m  MGBS 101-P
The Biggies Series 101-P
Height: 7.00m Width: 7.9m Length: 8.1m Fall Zone Area: 72m2 Free Height of Fall: 2.00m - MGBS 102-P
The Biggies Series 102-P
Height: 9.00m Width: 9.75m Length: 11.2m Fall Zone Area: 101m2 Free Height of Fall: 2.55m MGBS 102-PThe Biggies Series 102-P
Height: 9.00m Width: 9.75m Length: 11.2m Fall Zone Area: 101m2 Free Height of Fall: 2.55m - MGBS 103-P
The Biggies Series 103-P
Height: 6.75m Width: 8.3m Length: 12.5m Fall Zone Area: 113.6m2 Free Height of Fall: 3.00m MGBS 103-PThe Biggies Series 103-P
Height: 6.75m Width: 8.3m Length: 12.5m Fall Zone Area: 113.6m2 Free Height of Fall: 3.00m - MGBS 104-P
The Biggies Series 104-P
Height: 9.00m Width: 11.00m Length: 11.2m Fall Zone Area: 138m2 Free Height of Fall: 2.5m MGBS 104-PThe Biggies Series 104-P
Height: 9.00m Width: 11.00m Length: 11.2m Fall Zone Area: 138m2 Free Height of Fall: 2.5m - MGBS 105-P
The Biggies Series 105-P
Height: 9.00m Width: 12.00m Length: 15.00m Fall Zone Area: 134m2 Free Height of Fall: 2.5m MGBS 105-PThe Biggies Series 105-P
Height: 9.00m Width: 12.00m Length: 15.00m Fall Zone Area: 134m2 Free Height of Fall: 2.5m - AGFS 253
The Bird Tower
Height: 8.55m Width: 6.50m Length: 14.20m Fall Zone Area: 180.00m2 Free Height of Fall: 1.85m AGFS 253The Bird Tower
Height: 8.55m Width: 6.50m Length: 14.20m Fall Zone Area: 180.00m2 Free Height of Fall: 1.85m - AGFS 253-P
The Bird Tower (Poly)
Height: 8.55m Width: 6.35m Length: 11.35m Fall Zone Area: 180.00m2 Free Height of Fall: 1.85m AGFS 253-PThe Bird Tower (Poly)
Height: 8.55m Width: 6.35m Length: 11.35m Fall Zone Area: 180.00m2 Free Height of Fall: 1.85m - CC 44-1005-V99-GB
The City Watch Tower
Height: 6.39m Width: 6.11m Length: 6.98m Fall Zone Area: 58m2 Free Height of Fall: 1.67m CC 44-1005-V99-GBThe City Watch Tower
Height: 6.39m Width: 6.11m Length: 6.98m Fall Zone Area: 58m2 Free Height of Fall: 1.67m - CT 25-2001-99
The Conservatory
Height: 5.3m Width: 8.58m Length: 13.22m Fall Zone Area: 103m2 Free Height of Fall: 1.67m  CT 25-2001-99
The Conservatory
Height: 5.3m Width: 8.58m Length: 13.22m Fall Zone Area: 103m2 Free Height of Fall: 1.67m - AGFS 207
The Fantastic Series 1
Height: 9.45m Width: 3.30m Length: 12.00m Fall Zone Area: 80.00m2 Free Height of Fall: 2.20m AGFS 207The Fantastic Series 1
Height: 9.45m Width: 3.30m Length: 12.00m Fall Zone Area: 80.00m2 Free Height of Fall: 2.20m - AGFS 207-P
The Fantastic Series 2
Height: 9.45m Width: 6.65m Length: 3.65m Fall Zone Area: 60.00m2 Free Height of Fall: 2.20m AGFS 207-PThe Fantastic Series 2
Height: 9.45m Width: 6.65m Length: 3.65m Fall Zone Area: 60.00m2 Free Height of Fall: 2.20m - AGFS 208
The Fantastic Series 3
Height: 7.60m Width: 13.40m Length: 14.10m Fall Zone Area: 200.00m2 Free Height of Fall: 2.20m AGFS 208The Fantastic Series 3
Height: 7.60m Width: 13.40m Length: 14.10m Fall Zone Area: 200.00m2 Free Height of Fall: 2.20m - AGFS 208-P
The Fantastic Series 4
Height: 7.60m Width: 13.40m Length: 15.20m Fall Zone Area: 160.00m2 Free Height of Fall: 2.20m AGFS 208-PThe Fantastic Series 4
Height: 7.60m Width: 13.40m Length: 15.20m Fall Zone Area: 160.00m2 Free Height of Fall: 2.20m - AGFS 209-P
The Fantastic Series 5
Height: 9.45m Width: 17.80m Length: 21.60m Fall Zone Area: 370.00m2 Free Height of Fall: 2.20m AGFS 209-PThe Fantastic Series 5
Height: 9.45m Width: 17.80m Length: 21.60m Fall Zone Area: 370.00m2 Free Height of Fall: 2.20m - AGFS 210-P
The Fantastic Series 7
Height: 4.65m Width: 5.45m Length: 5.20m Fall Zone Area: 55.00m2 Free Height of Fall: 2.20m AGFS 210-PThe Fantastic Series 7
Height: 4.65m Width: 5.45m Length: 5.20m Fall Zone Area: 55.00m2 Free Height of Fall: 2.20m - CDP 101
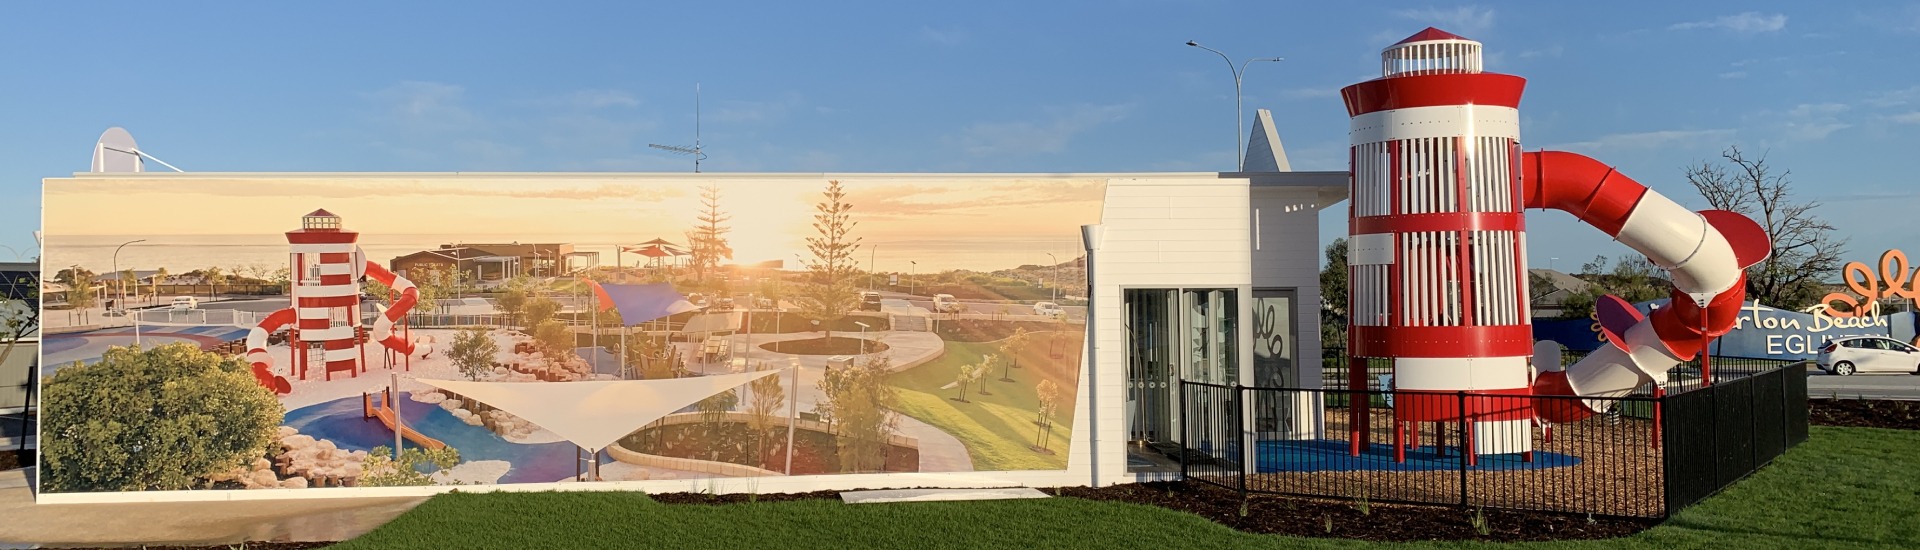
The Galata Tower
Height: 11.00m Width: 8.00m Length: 11.3m Fall Zone Area: 96m2 Free Height of Fall: 1.7m CDP 101The Galata Tower
Height: 11.00m Width: 8.00m Length: 11.3m Fall Zone Area: 96m2 Free Height of Fall: 1.7m