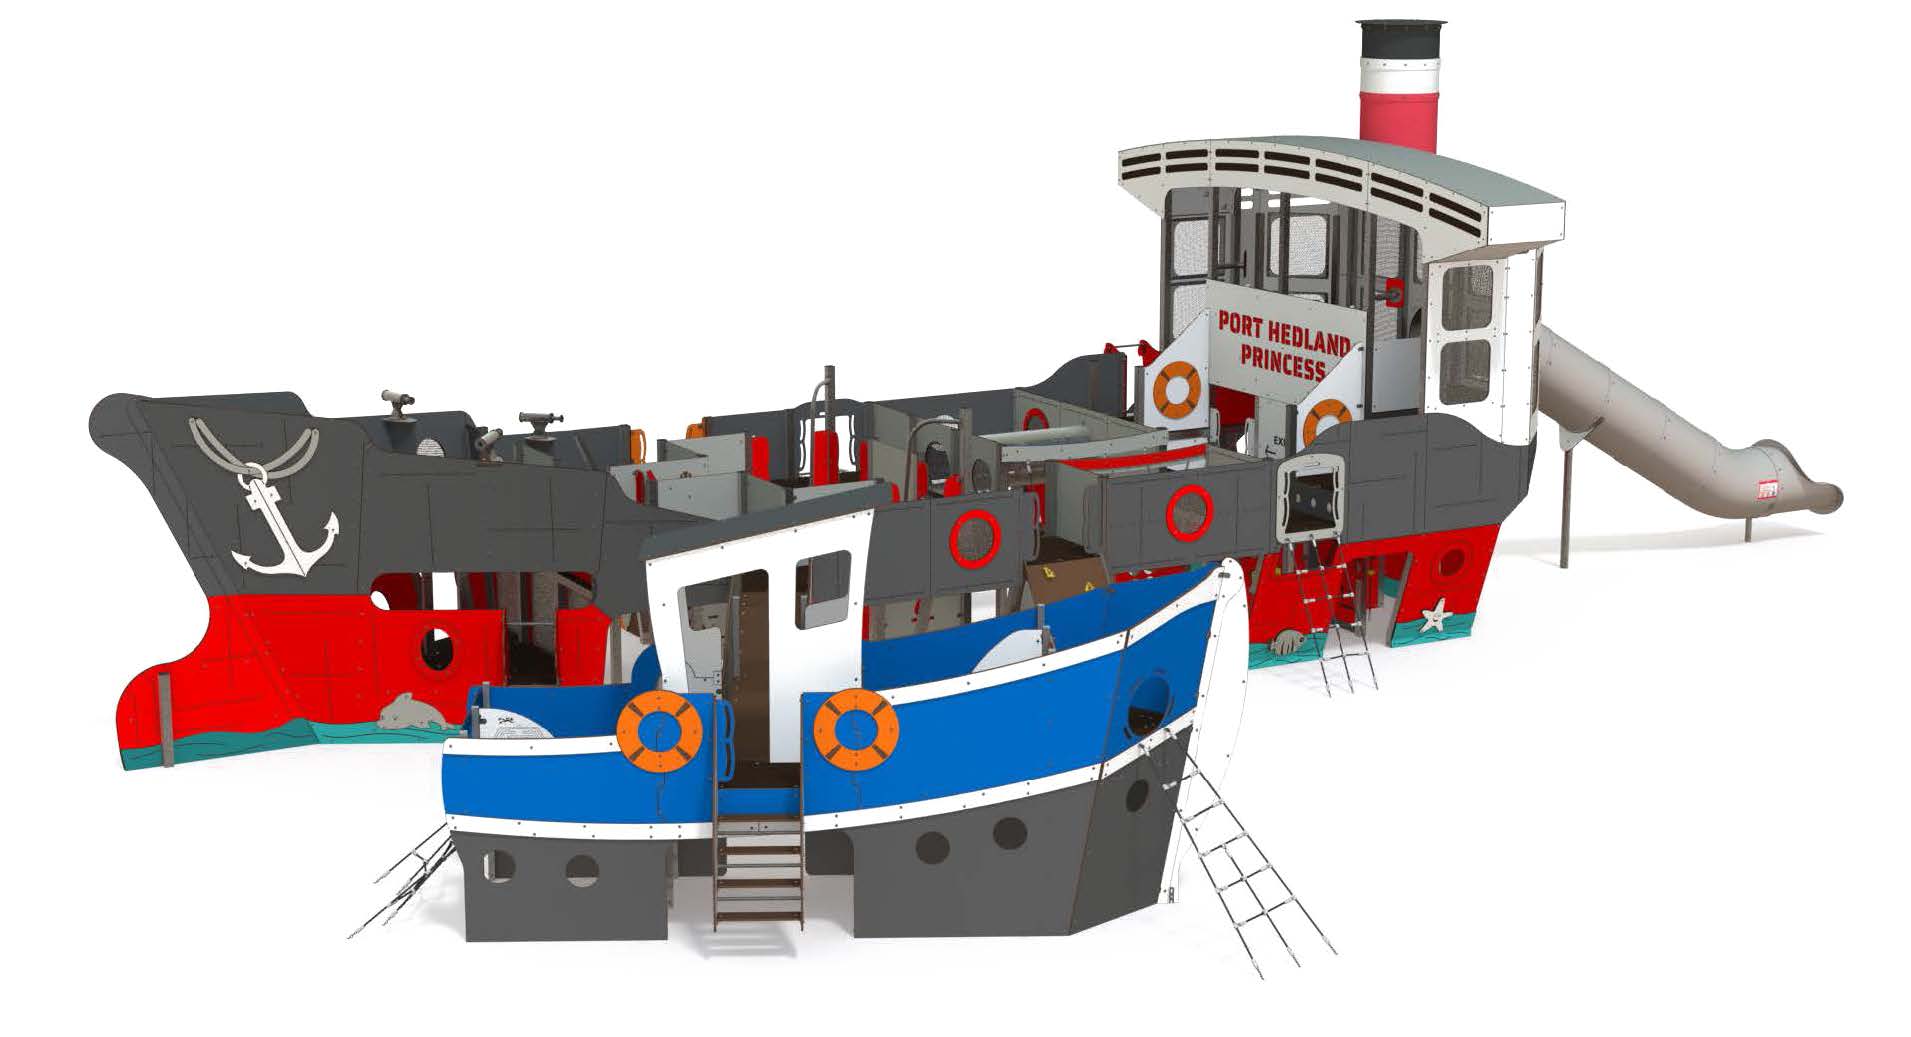
| Height: | 2.84m |
| Width: | 2.33m |
| Length: | 3.91m |
| Fall Zone Area: | 23m2 |
| Free Height of Fall: | 1m |
| Height: | 2.84m |
| Width: | 2.33m |
| Length: | 3.91m |
| Fall Zone Area: | 23m2 |
| Free Height of Fall: | 1m |
| Height: | 6.15m |
| Width: | 5m |
| Length: | 8.62m |
| Fall Zone Area: | 72m2 |
| Free Height of Fall: | 1.95m |
| Height: | 6.15m |
| Width: | 5m |
| Length: | 8.62m |
| Fall Zone Area: | 72m2 |
| Free Height of Fall: | 1.95m |
| Height: | 2.97m |
| Width: | 3.55m |
| Length: | 3.86m |
| Fall Zone Area: | 34m2 |
| Free Height of Fall: | 1.75m |
| Height: | 2.97m |
| Width: | 3.55m |
| Length: | 3.86m |
| Fall Zone Area: | 34m2 |
| Free Height of Fall: | 1.75m |
| Height: | 3.11m |
| Width: | 2.43m |
| Length: | 4.35m |
| Fall Zone Area: | 30m2 |
| Free Height of Fall: | 1.11m |
| Height: | 3.11m |
| Width: | 2.43m |
| Length: | 4.35m |
| Fall Zone Area: | 30m2 |
| Free Height of Fall: | 1.11m |
